DIY Castle Planter Using Cardboard and Glass Bottles - Creative Mom
FBTwitterReddit
video description
Rating: 4.0; Vote: 1
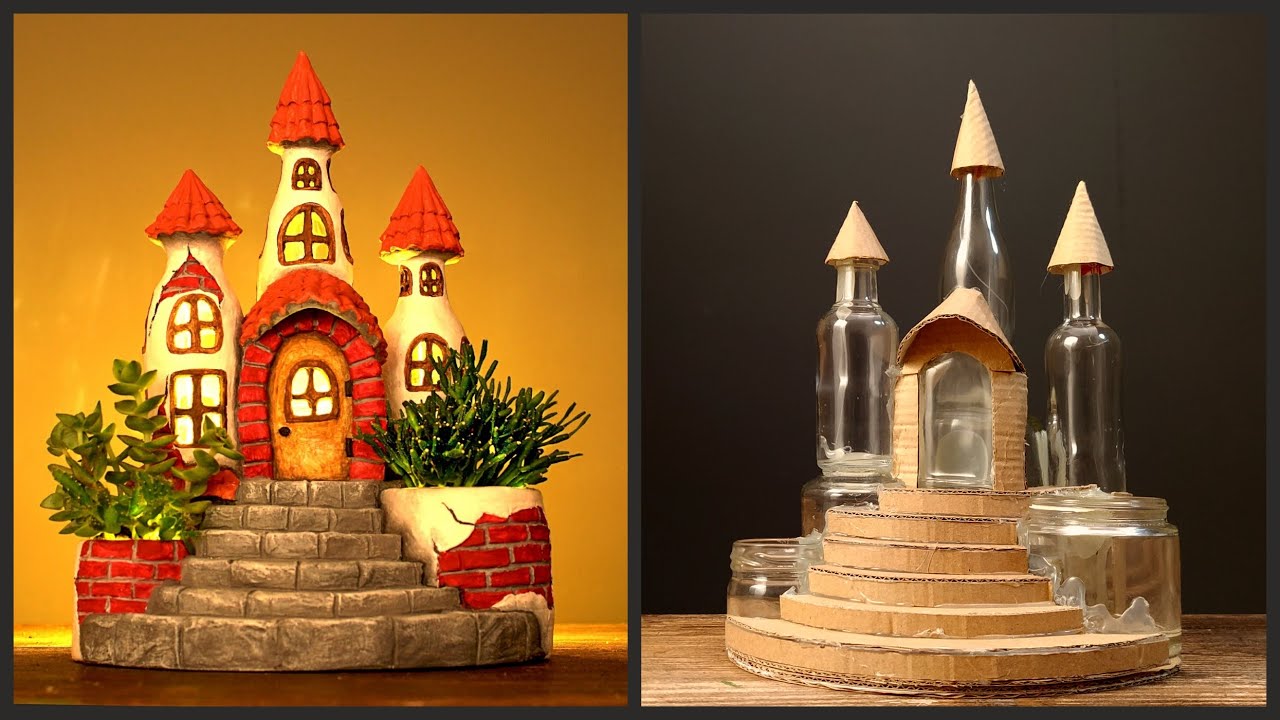
Hello, in this video I'm making a fairy castle planter using some glass bottles, jars(two of them will serve as planters) and cardboard for the basic shape and paper clay for the surface and details. Like always I start by gluing the jars and bottles in the desired shape using hot glue. I used cardboard for some of the walls, roofs and stairs. I created a secret room under the stairs where the lights will fit nicely. When the main shape is finished I cover everything in paper clay. I used Das modelling material but you can use any paper clay as long as it has dimensional stability when it dries and doesn't shrink and crumble. I work in small portions and cut out the windows as I go along. I apply a thin layer of 2 or 3 mm all around. When this layer is dry I add details like window frames, bricks, roof tiles and stones. When the details are dried it's time for painting. As always I apply the main colors to all the elements and then add some lights and shades to the stones and bricks. I used acrylics for this project. After the painting is done I use the two jars at the front of the castle to plant some succulents. Don't ask me exactly what plants I use because I'm not that familiar with the names. I only know they are succulents. After the plants are in place it's time to turn on the lights and enjoy a cool night lamp that is also an awesome planter. Have fun with this project
Ozwald: If you are going to plant succulents, be aware they are in the catus family. And they love lots and lots of sunlight. If they dont get it they will put out thin long streamers that search for bright sunlight. Eventually they will perish. Also be stingy with water, say a couple of tablespoons every other day, otherwise the roots can and will rot. Date: 2022-04-28