This tutorial will show you how to create a timeline in Word.
In this tutorial you are going to learn how to make a timeline in Word.
Step # 1 -- Creating a New Document
Create a new document in Word and you will want to insert a graphic that will represent our timeline. From the ribbon at the top click on Insert and below this click the SmartArt logo in the Illustrations area. The Choose a SmartArt Graphic window will open.
Step # 2 -- Inserting the Timeline and Entering Some Data
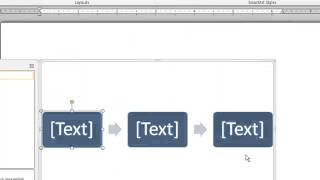
From the options on the left select Process and then on the right look through and find one appropriate for a timeline, here we are using Basic Timeline, click OK to insert this into your image. You will now have to enter data into the timeline, here we are going to enter some concurrent events.
Step # 3 -- Adding Additional Events
You are also able to add additional events. Click on the arrow, then right click on it and in the menu that appears navigate to Add Shape then click Add Shape After or Add Shape Before. Here we are choosing to add a shape after, this will add a new point to our timeline and we can add text to it just as before and that is how to make a timeline in Word
JZ: What if you want to go to the next line, if you have more events, want to fill the whole page. Is there something that continues the process to the next line or we have to recreate another timeline again? Date: 2023-07-08