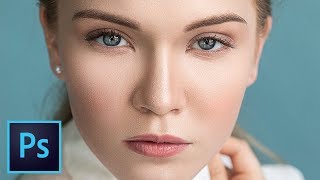
High-End Skin Retouching & Sculpting in Photoshop
video description
Date: 2022-07-19
Related videos


Comments and reviews: 19
Rudraksh
For those who want to review the stages in a short time, I wrote the steps below
1-) Remove Blemishes
Create new layer, fix blemishes with regular healing brush,
( Pro Tip: Adjustment lair Black/White with lowered reds can help you spot the blemishes )
2-) Make 2 copies of it, Ctrl/cmd + J
one for color, one for texture.
3-) Add Gausian Blur to Color Layer
4-) Select texture layer, go to image and apply image. Substract Color layer with scale: 2 and offset: 128, Change blend mode from normal to lineer light
5-)Put texture and color layers into a group with cntr/cmd +G
6-) Paint on a new layer between color and texture layers with a soft brush, take samples from the models face. Turning texture layer invisible and looking without zoom may help you decide.
(Make different layers for different parts. You can play with oppacity afterwards)
7-)Apply Dodge and Burn with creating a colors adjustment level and painting with white after masking it all black
Extra 8-) Liquify: create a merged layer by pressing shift +ctrl/cmd + alt/opt + e. convert it into smart filter. Apply filter liquify
reply
For those who want to review the stages in a short time, I wrote the steps below
1-) Remove Blemishes
Create new layer, fix blemishes with regular healing brush,
( Pro Tip: Adjustment lair Black/White with lowered reds can help you spot the blemishes )
2-) Make 2 copies of it, Ctrl/cmd + J
one for color, one for texture.
3-) Add Gausian Blur to Color Layer
4-) Select texture layer, go to image and apply image. Substract Color layer with scale: 2 and offset: 128, Change blend mode from normal to lineer light
5-)Put texture and color layers into a group with cntr/cmd +G
6-) Paint on a new layer between color and texture layers with a soft brush, take samples from the models face. Turning texture layer invisible and looking without zoom may help you decide.
(Make different layers for different parts. You can play with oppacity afterwards)
7-)Apply Dodge and Burn with creating a colors adjustment level and painting with white after masking it all black
Extra 8-) Liquify: create a merged layer by pressing shift +ctrl/cmd + alt/opt + e. convert it into smart filter. Apply filter liquify
reply
Claudian
Sorry, but you are not retouching the skin, you modify the physiognomy of the face and it looks horrible. I call this hard editing. It doesn't look like a real person anymore. The whole face looks flat and lifeless.
In the end the face looks so fake, it gives the impression it was composed on a different body and it doesn't belong to this photo. You cannot sculpt photos unless you are a very good painter and even in that case it would not look 100% real. But you are not.
reply
Sorry, but you are not retouching the skin, you modify the physiognomy of the face and it looks horrible. I call this hard editing. It doesn't look like a real person anymore. The whole face looks flat and lifeless.
In the end the face looks so fake, it gives the impression it was composed on a different body and it doesn't belong to this photo. You cannot sculpt photos unless you are a very good painter and even in that case it would not look 100% real. But you are not.
reply
Reyna
WOW. I haven't even finish to see this video, and I can tell you are a great teacher! It is the one of the few videos that takes the time to explain the whys and hows. Using an easy language, in a good speed for beginners (and I am sure it is useful for those not so beginners as well. Fantastic video, fantastic teacher. Many thanks.
reply
WOW. I haven't even finish to see this video, and I can tell you are a great teacher! It is the one of the few videos that takes the time to explain the whys and hows. Using an easy language, in a good speed for beginners (and I am sure it is useful for those not so beginners as well. Fantastic video, fantastic teacher. Many thanks.
reply
Dakota
Are there advantages or disadvantages to using the paint brush on a new layer over the mixer brush on the color layer when working with frequency separation to adjust tones? I'm guessing the brush and new layer allows for more flexibility in editing specific areas.
reply
Are there advantages or disadvantages to using the paint brush on a new layer over the mixer brush on the color layer when working with frequency separation to adjust tones? I'm guessing the brush and new layer allows for more flexibility in editing specific areas.
reply
Roy
Thank you for amazing tutorials. However, you are always using light skin models. Can you please do a few tutorials on processing/adjusting dark skin. Things either look different or don't work the same. Thank you.
reply
Thank you for amazing tutorials. However, you are always using light skin models. Can you please do a few tutorials on processing/adjusting dark skin. Things either look different or don't work the same. Thank you.
reply
Mateja
The skin is so over-edited and tacky looking, especially in a basic looking setting like this. But hey, it's a photographer's job to give people what they like, and sadly most people are into this kind of thing
reply
The skin is so over-edited and tacky looking, especially in a basic looking setting like this. But hey, it's a photographer's job to give people what they like, and sadly most people are into this kind of thing
reply
Ivan
You can use patch tool on blurred (color) layer to make softer transition between highlights and shadows on skin without damaging details because it only effects colors.
reply
You can use patch tool on blurred (color) layer to make softer transition between highlights and shadows on skin without damaging details because it only effects colors.
reply
ashraful
Thanks for nicely explained. Do you prefer AI tools like Autoretouch to automate skin retouching process? I need your opinion on whether I should use it or not.
reply
Thanks for nicely explained. Do you prefer AI tools like Autoretouch to automate skin retouching process? I need your opinion on whether I should use it or not.
reply
Jason
Ive been seeing so many people do FS with the lasso tool but when I try it, my images lose all sharpness. I truly love this method better. Cant wait to try it.
reply
Ive been seeing so many people do FS with the lasso tool but when I try it, my images lose all sharpness. I truly love this method better. Cant wait to try it.
reply
thepoliskey
It doesn't work for me: ( When I create a layer between texture and color, the brush doesn't take sample from color layer - what am I doing wrong?
reply
It doesn't work for me: ( When I create a layer between texture and color, the brush doesn't take sample from color layer - what am I doing wrong?
reply
Piumie
I have a problem whenever i pick a color(alt) to pain the skin it doesn't pick the right colour. The picked one and the one in skin is different
reply
I have a problem whenever i pick a color(alt) to pain the skin it doesn't pick the right colour. The picked one and the one in skin is different
reply
Cemil
I wrote that the videos are long. I deleted the comment because I thought I was unfair to you. Thank you very much for your sharing.
reply
I wrote that the videos are long. I deleted the comment because I thought I was unfair to you. Thank you very much for your sharing.
reply
imam
hi, piximoerfect, which will be best for graphic design desktop or laptop? if I buy a laptop in which configure I should buy
reply
hi, piximoerfect, which will be best for graphic design desktop or laptop? if I buy a laptop in which configure I should buy
reply
muhammad
you are the best instructor in the world. you have no idea how much i have improved my editing by watching your videos.
reply
you are the best instructor in the world. you have no idea how much i have improved my editing by watching your videos.
reply
ADxGE
on the nose part how to remove the blemishes. the spot healing brush doesn't work well. I am a beginner. tell me, please.
reply
on the nose part how to remove the blemishes. the spot healing brush doesn't work well. I am a beginner. tell me, please.
reply
Abu
I really like the way to explain your tutorials. I have learnt from you a lot. From Freetown, Sierra Leone, West Africa
reply
I really like the way to explain your tutorials. I have learnt from you a lot. From Freetown, Sierra Leone, West Africa
reply
Crow
I couldn't hold the brush and draw, i have to keep clicking it. Any idea how to make it work by just click and hold?
reply
I couldn't hold the brush and draw, i have to keep clicking it. Any idea how to make it work by just click and hold?
reply
MR
you are awwesome. you explained every single steps. i tried other tutorials but did'nt understend anything. thanks
reply
you are awwesome. you explained every single steps. i tried other tutorials but did'nt understend anything. thanks
reply
Mikey
Wonderful tutorial! You have a lovely clear voice and work at a helpful pace. Youre so good at this. Brilliant!
reply
Wonderful tutorial! You have a lovely clear voice and work at a helpful pace. Youre so good at this. Brilliant!
reply
Add a review, comment
Other channel videos