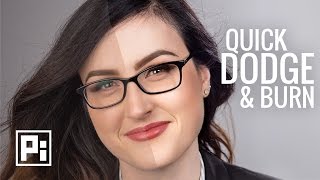
2 Surprising Tools to Remove Halos Easily in Photoshop!
video description
Date: 2022-07-19
Related videos




Comments and reviews: 17
tykejack
I've always enjoyed this method with some success.
1. duplicate the masked photo and apply the mask to the layer. This gives you a cut-out of the person.
2. Change the blending mode to soft light or overlay
3. Move the cutout layer below the original image with the mask
4. Paint with the black brush around the original mask, just enough to get rid of the edges.
5. Done.
This works great for hair and only okay for more solid objects like cloths or skin. The hair is still there, but because it's overlay or soft light, it's only making luminosity differences on the background. So the dark hair will still appear dark and the white trim will just blend into the background. It doesn't always work, but if you have a lot of loose strands where the original background is preserved in the mask, it can help get rid of it.
Another method would be just to find a hair texture brush and use the color sampling method you used. Then you can control the angle with the direction you're painting. So you're painting with a hair texture over those fringes.
reply
I've always enjoyed this method with some success.
1. duplicate the masked photo and apply the mask to the layer. This gives you a cut-out of the person.
2. Change the blending mode to soft light or overlay
3. Move the cutout layer below the original image with the mask
4. Paint with the black brush around the original mask, just enough to get rid of the edges.
5. Done.
This works great for hair and only okay for more solid objects like cloths or skin. The hair is still there, but because it's overlay or soft light, it's only making luminosity differences on the background. So the dark hair will still appear dark and the white trim will just blend into the background. It doesn't always work, but if you have a lot of loose strands where the original background is preserved in the mask, it can help get rid of it.
Another method would be just to find a hair texture brush and use the color sampling method you used. Then you can control the angle with the direction you're painting. So you're painting with a hair texture over those fringes.
reply
No
Please consider doing a halo removal video on a complex image. For ex, a harbor full of sailboats. Can't simply select the background or foreground as they are broken up w masts, rigging, lines, sails etc. I hope you consider this. Love your vids - the best on YT!
reply
Please consider doing a halo removal video on a complex image. For ex, a harbor full of sailboats. Can't simply select the background or foreground as they are broken up w masts, rigging, lines, sails etc. I hope you consider this. Love your vids - the best on YT!
reply
Jeremy
Recently shot corporate headshots that I knew I had to cut out and like an idiot completely forgot not to shoot them at a low aperture. This video is a total lifesaver. Better results than I was getting otherwise in half the time. Thank you!
reply
Recently shot corporate headshots that I knew I had to cut out and like an idiot completely forgot not to shoot them at a low aperture. This video is a total lifesaver. Better results than I was getting otherwise in half the time. Thank you!
reply
Akshay
Smudge tool seems a bit harsh on the image, I like the effects that we can achieve with Burn and Dodge
But for sweater area, defringe could also be an option, I think Unmesh does not like that tool alot
reply
Smudge tool seems a bit harsh on the image, I like the effects that we can achieve with Burn and Dodge
But for sweater area, defringe could also be an option, I think Unmesh does not like that tool alot
reply
Carto
Do you have a video on selection with busy backgrounds? For instances, I want select a log laying in pile of leaves. The colors are similar between the log and leaves, making it difficult to select.
reply
Do you have a video on selection with busy backgrounds? For instances, I want select a log laying in pile of leaves. The colors are similar between the log and leaves, making it difficult to select.
reply
Bobby
I have more easy trick for that just select the subject or layer having halos with Ctrl+click and just Ctrl-x and Ctrl-v, halos would come on new layer just delete this layer. Try and reply.
reply
I have more easy trick for that just select the subject or layer having halos with Ctrl+click and just Ctrl-x and Ctrl-v, halos would come on new layer just delete this layer. Try and reply.
reply
Mike
Thank you anyway. Completely lost. My image is not responding as I follow along. Just a general comment. I have to slow down playback speed to 50% for any type of comprehension. Sorry.
reply
Thank you anyway. Completely lost. My image is not responding as I follow along. Just a general comment. I have to slow down playback speed to 50% for any type of comprehension. Sorry.
reply
Ernst
Rewatching this after a year or so, I still am confused about the painting outside the hair area. How did you use this invisible (outside of mask) colours with the clone stamp later?
reply
Rewatching this after a year or so, I still am confused about the painting outside the hair area. How did you use this invisible (outside of mask) colours with the clone stamp later?
reply
Juan
Another good way to get rid of halos is select the subject you have already masked, invert (Ctrl+I on Windows) and erase. That way you will get from most of the halo of the image.
reply
Another good way to get rid of halos is select the subject you have already masked, invert (Ctrl+I on Windows) and erase. That way you will get from most of the halo of the image.
reply
bettle
I like this video. I deleted the background of my image then added it to a background image but I can still see a box from the original picture around me. How can I fix that?
reply
I like this video. I deleted the background of my image then added it to a background image but I can still see a box from the original picture around me. How can I fix that?
reply
Aashna
I have never learned photoshop this much in my institute the way I have learned here. THANKS A LOT. Also, I make proper notes as well while you explain everything in detail.
reply
I have never learned photoshop this much in my institute the way I have learned here. THANKS A LOT. Also, I make proper notes as well while you explain everything in detail.
reply
Cleber
I always start your videos thinking that I already know the best way to do something, and I always find out you have a better way of doing that!
reply
I always start your videos thinking that I already know the best way to do something, and I always find out you have a better way of doing that!
reply
George
Counter Clockwise not anti-clockwise. I've heard you so many times saying this. BTW: I love your videos and I've learn a lot of things from you.
reply
Counter Clockwise not anti-clockwise. I've heard you so many times saying this. BTW: I love your videos and I've learn a lot of things from you.
reply
Sam
im having to print on clear acrylic and the selection has a white halo around it in print but not on the computer HELLLLPPPP
reply
im having to print on clear acrylic and the selection has a white halo around it in print but not on the computer HELLLLPPPP
reply
Balakrishnan
Hi Unmesh, I just saw your wonderful video, and I want to know how to get rid of all the layers after you finish
reply
Hi Unmesh, I just saw your wonderful video, and I want to know how to get rid of all the layers after you finish
reply
nate2838
This video is exactly what i needed. The hair especially has always been a problem for me. Thank you so much!
reply
This video is exactly what i needed. The hair especially has always been a problem for me. Thank you so much!
reply
Faith
Been trying to problem solve this for a few days unfortunately, so glad I found your video! Thank you so much!
reply
Been trying to problem solve this for a few days unfortunately, so glad I found your video! Thank you so much!
reply
Add a review, comment
Other channel videos