Pixel Stretch Effect with 3 Simple Steps in Photoshop!
video description
Date: 2022-07-19
Related videos


Comments and reviews: 12
MULTIPRINT
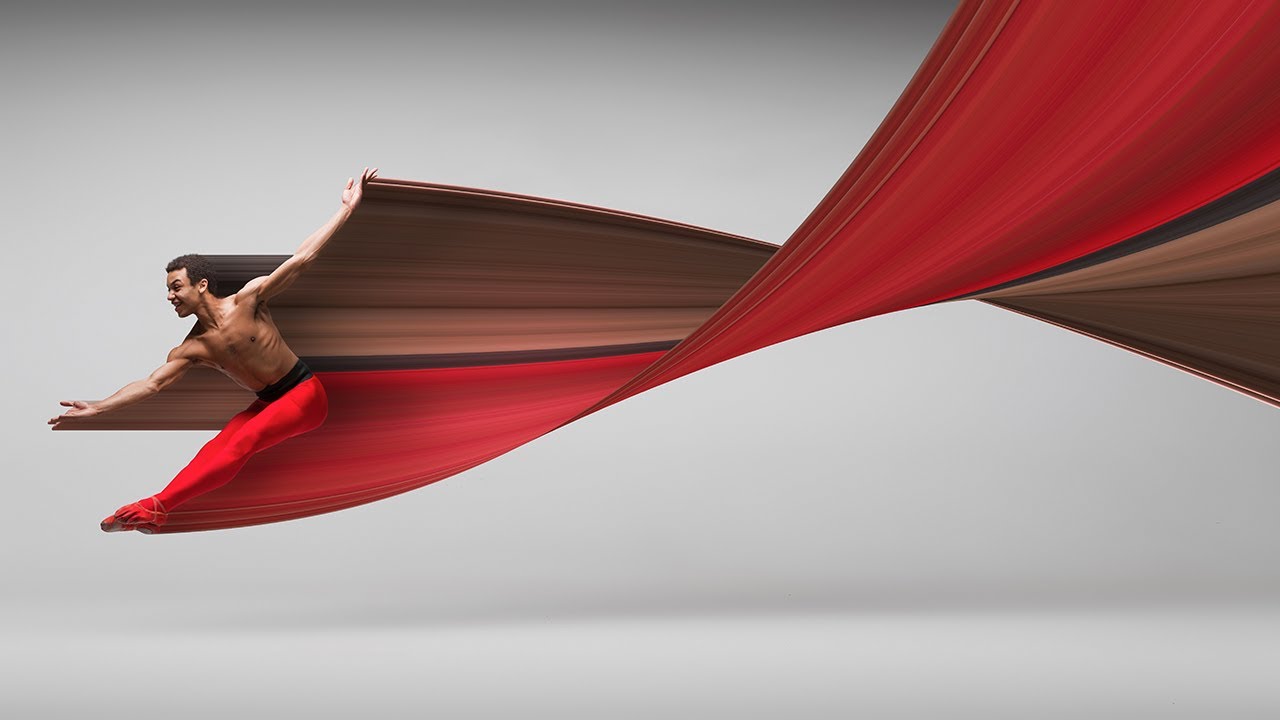
Hello Unmesh, just a thought crossed my mind, can we Convert raster selection into vector path in photoshop, the image used that of an athlete here was crisp and sharp, so wouldn't it be easy just to make a selection via object selection tool, and do some gimmicks (u may know it) and then have it as a vector mask / path out of this athlete's image, can you please guide me, or if u have any video made for that earlier can you please refer? Thank You,
reply
Benyamin
Nice one Unmesh. I was thinking, instead of Ctrl+J then Movie 1 px, Why not use Ctrl+Alt+(Arrow keys (in the desired direction? Even by adding Shift to combo it can move 10px. I used this combo when there were no 3D introduced in PS. It would be fantastic if you could elaborate? maybe I am missing something?
reply
Chuck
Thank you for taking the time to explain why you do things, even though it makes the videos longer. There are plenty of tutorials that show what to do without explaining why. That, in my opinion, is not the way to learn.
reply
Thank you for taking the time to explain why you do things, even though it makes the videos longer. There are plenty of tutorials that show what to do without explaining why. That, in my opinion, is not the way to learn.
reply
Pixel
the pro tutorial what i needed from this type of effects, thank you Unmesh! i am a veteran graphic designer but i still fcking love your tutorials, they are mindblowing all the time. Thank you man! high five! :)
reply
the pro tutorial what i needed from this type of effects, thank you Unmesh! i am a veteran graphic designer but i still fcking love your tutorials, they are mindblowing all the time. Thank you man! high five! :)
reply
CHIRAG
Hey! Unmesh I am not able to downlode the sample image provided in the description so due to not having of subscription to envato please help with with this problem. I hope you will do the needful.
reply
Hey! Unmesh I am not able to downlode the sample image provided in the description so due to not having of subscription to envato please help with with this problem. I hope you will do the needful.
reply
Jhay-ar
Good day sir Unmesh, im a fan. i have studied some of your process and it works on my job as part time photographer.
thank you so much.
from Philippines here.
keep safe
reply
Good day sir Unmesh, im a fan. i have studied some of your process and it works on my job as part time photographer.
thank you so much.
from Philippines here.
keep safe
reply
Honey
you are doing amazing work. Please can you make any short video of light trails effects of stars.
By the way thanks for making such these amazing videos for us.
reply
you are doing amazing work. Please can you make any short video of light trails effects of stars.
By the way thanks for making such these amazing videos for us.
reply
Pixel
Awesome video. you explained it very well, as usual. I do a similar video related to photoshop: ) If you will checkout videos it will be very helpful. Thanks
reply
Awesome video. you explained it very well, as usual. I do a similar video related to photoshop: ) If you will checkout videos it will be very helpful. Thanks
reply
RainyDayBX
Unmesh keeps handing out bonus tips and I am here for it! Thank you for explaining why and how certain tools can be used.
reply
Unmesh keeps handing out bonus tips and I am here for it! Thank you for explaining why and how certain tools can be used.
reply
Itai
Love you and your vids (perhaps alt/option then left or right arrow and add merge to the action for each layer created)
reply
Love you and your vids (perhaps alt/option then left or right arrow and add merge to the action for each layer created)
reply
Hossein
You don't have to press Ctrl+J then press Left Arrow. JUST HOLD CTRL THEN PRESS LEFT ARROW AS MUCH AS YOU WANT
reply
You don't have to press Ctrl+J then press Left Arrow. JUST HOLD CTRL THEN PRESS LEFT ARROW AS MUCH AS YOU WANT
reply
Otto
Wow. Just wow. This is one of THE best PS tutorials I have ever seen. Dang, great job Unmesh. Thank you.
reply
Wow. Just wow. This is one of THE best PS tutorials I have ever seen. Dang, great job Unmesh. Thank you.
reply
Add a review, comment
Other channel videos


