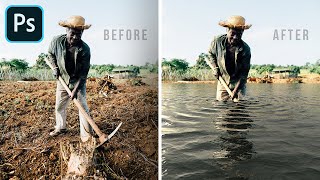
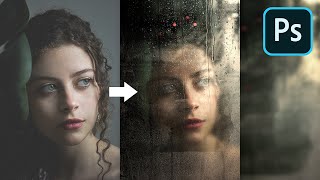
The Hidden Halo Removal Slider in Photoshop!
video description
Ctrl+left click on the layer mask to get it's selection
Ctrl+J on the layer ( not the layer mask, you will copy the content cropped in to a new layer.
Now:
Go to Layer menu - Halo- Remove halo- set value to 1.
This will remove the halo automatically of the whole image.
It takes a 6 seconds average to do this to whatever image.
Date: 2022-07-19
Related videos


Comments and reviews: 19
Equilion
This method works with clear edges like you showed. What about a portrait with a beard-stubbled face at the edge (no long beard? It softens the stubbles and looks ugly: (
Any idea, how to remove the halos there? I have 70+ photos to retouch and don't want to fumble with smudging the masks. Thanks in advance for your tipps.
reply
Michael
Since you already have a mask around her, you can also just use the layer styles and apply an inner glow, which you make black or any dark color that best fits. You can also control radius and smoothness. Then split the layer-style to a separate layer, apply a mask and then only mask it in where you want.
reply
HollowArt
PIXimperfect, do you have a tutorial or can you create a tutorial video, where you combine 3 or more of your techniques? For example, finding a complex photo that you would have to remove the background, create a shadow, and remove the halo? Just curious, thanks for the great video and tips!
reply
PIXimperfect, do you have a tutorial or can you create a tutorial video, where you combine 3 or more of your techniques? For example, finding a complex photo that you would have to remove the background, create a shadow, and remove the halo? Just curious, thanks for the great video and tips!
reply
Brett
Save yourself some time and record an action.
Trick I've been using since 1999. Expand/contract your selection by a couple of pixels. Filter>Blur>Gaussian Blur. 6 (ish) Then delete. This gives those few pixels a transparent gradient. And allows the background to bloom through.
reply
Save yourself some time and record an action.
Trick I've been using since 1999. Expand/contract your selection by a couple of pixels. Filter>Blur>Gaussian Blur. 6 (ish) Then delete. This gives those few pixels a transparent gradient. And allows the background to bloom through.
reply
Tranquil
I've been searching for a solution to feathering. I've been editing my images in premiere because I had no idea how to feather anything. I'm going to go cutout a lot of stuff and play around with this. Thanks so much.
reply
I've been searching for a solution to feathering. I've been editing my images in premiere because I had no idea how to feather anything. I'm going to go cutout a lot of stuff and play around with this. Thanks so much.
reply
Damin
I must be missing something. I still see a glowing edge. just less of one. What did this remove? It still looks like the subject has a highlight to the mask edge. I don't see a difference beyond a slight one.
reply
I must be missing something. I still see a glowing edge. just less of one. What did this remove? It still looks like the subject has a highlight to the mask edge. I don't see a difference beyond a slight one.
reply
durereee
great, thank you for explaining those filters!
one thing I would say though, in this particular case you can get rid of the halos by playing with the options in select and mask
reply
great, thank you for explaining those filters!
one thing I would say though, in this particular case you can get rid of the halos by playing with the options in select and mask
reply
drawitoutlady
For some reason when I change the feather value when using the lasso, it stays the same. I tried feather at 1 px and at 80 px, and both produce the same results. Any idea why?
reply
For some reason when I change the feather value when using the lasso, it stays the same. I tried feather at 1 px and at 80 px, and both produce the same results. Any idea why?
reply
durereee
great, thank you for explaining those filters!
one thing I would say though, in this particular case you can get rid of the halos by playing with the options in select and mask
reply
great, thank you for explaining those filters!
one thing I would say though, in this particular case you can get rid of the halos by playing with the options in select and mask
reply
Venture
Thats pretty neat. I tend too do that from the select subject menu and then edit from the select mask menu. Bring in the outside of the image and then feather. I like this new way!
reply
Thats pretty neat. I tend too do that from the select subject menu and then edit from the select mask menu. Bring in the outside of the image and then feather. I like this new way!
reply
Plopz
Hello bro, please help me how do you do that 3: 36 re-align the image or re-fit the image into the center if you zooming in the image are you using a shortcut key? Please tell me
reply
Hello bro, please help me how do you do that 3: 36 re-align the image or re-fit the image into the center if you zooming in the image are you using a shortcut key? Please tell me
reply
conehead210
too much time doing that way. you just apply the feather to the active mask > select invert and delete the bg. fine tune missing details beforehand
reply
too much time doing that way. you just apply the feather to the active mask > select invert and delete the bg. fine tune missing details beforehand
reply
hexgraphica
Brush some slight blur on the mask edge and then shadow burning or light dodging until it's ok. Mask blurring to smooth the edges and you're done
reply
Brush some slight blur on the mask edge and then shadow burning or light dodging until it's ok. Mask blurring to smooth the edges and you're done
reply
Karim
Nice one, saved me lots of time. Just a little request, please do not use womens photos, I'm a muslim and this kind of photos are forbidden.
reply
Nice one, saved me lots of time. Just a little request, please do not use womens photos, I'm a muslim and this kind of photos are forbidden.
reply
Satish
Many times halo's takes much time to get them out.
This method helped me a lot & saves much time.
Love you.
Thanks Sir ji.
reply
Many times halo's takes much time to get them out.
This method helped me a lot & saves much time.
Love you.
Thanks Sir ji.
reply
Makopowered
I have been working with Photoshop for. longer than I care to admit, and I had no idea about this! Thank you!
reply
I have been working with Photoshop for. longer than I care to admit, and I had no idea about this! Thank you!
reply
Atze
In this case I just take my selection and decrease it by 1px. It's quick n dirty but in most cases more than enough.
reply
In this case I just take my selection and decrease it by 1px. It's quick n dirty but in most cases more than enough.
reply
Bwern
never in my life did I think I would see an attractive girl being used as clickbait for a photoshop tutorial
reply
never in my life did I think I would see an attractive girl being used as clickbait for a photoshop tutorial
reply
Anthony
learning so much from you my friend thankyou. Can I ask once you have done this above how do you apply it?
reply
learning so much from you my friend thankyou. Can I ask once you have done this above how do you apply it?
reply
Add a review, comment
Other channel videos