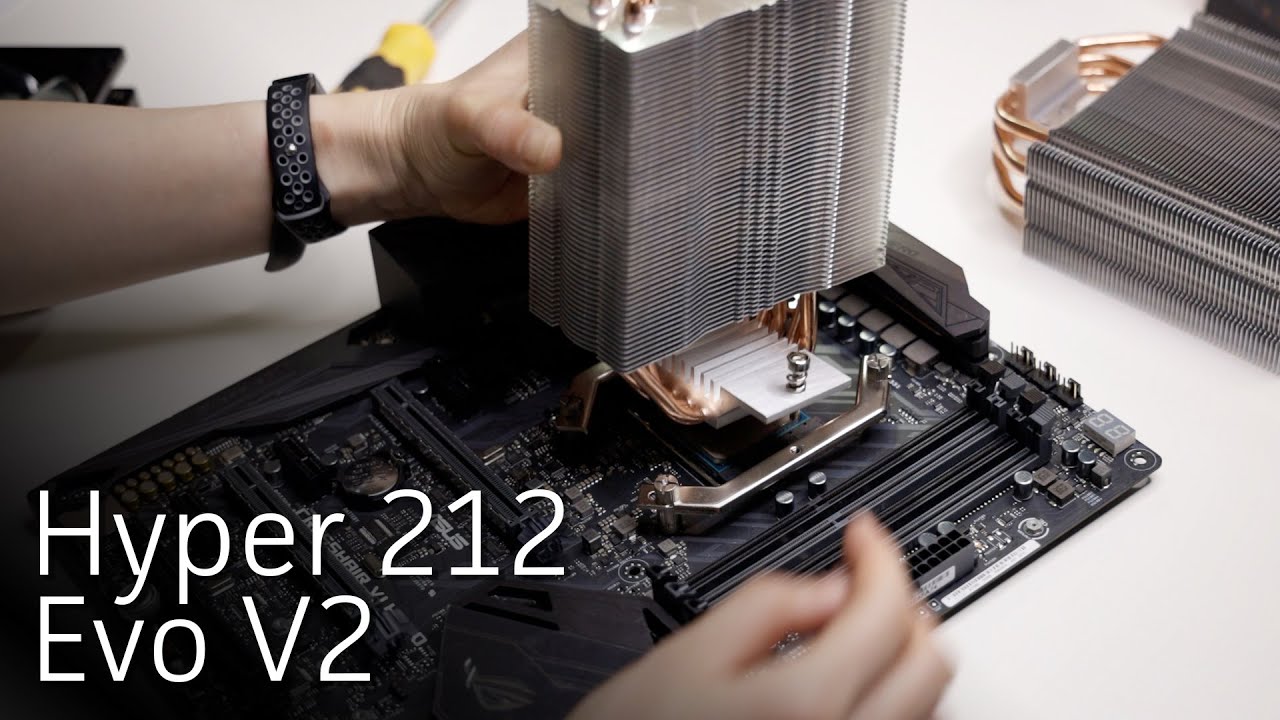
How to install the Hyper 212 Evo V2
video description
Date: 2022-03-15
Related videos




Comments and reviews: 10
ccederlo
This cooler does NOT install well to an AM4 motherboard. I'm an engineer working in consumer electronics and am thoroughly disappointed. DO NOT BUY for AM4 mounting. I just tried to install on my motherboard
1) The hole diameters in the motherboard are way larger than the standoffs. This means the 212 can shift around a lot in the plane of the motherboard (xy plane. Look at the diameter difference at 3: 30 between the hole and the standoff.
2) The standoffs don't fully tighten to the motherboard. There is a gap when the standoffs are bottomed out.
You can see both of them at 3: 45. Notice how the standoff stays in place as she moves the motherboard around. That is bad, just bad. She says you need to lift it up to tighten it down, but it has already bottomed out.
Thus, the mounting brackets that align the cooler are very loose when it should be tight! Let me repeat. the parts that are designed to align the 212 to the CPU do not function.
Also, I want to point out she did not show using thermal paste between the CPU and the cooler. This is the MOST CRITICAL STEP! The thermal transfer between the two components is very dependent on that thermal paste. You'll have hot CPUs at minimal loads without it and likely damage the CPU at load.
reply
This cooler does NOT install well to an AM4 motherboard. I'm an engineer working in consumer electronics and am thoroughly disappointed. DO NOT BUY for AM4 mounting. I just tried to install on my motherboard
1) The hole diameters in the motherboard are way larger than the standoffs. This means the 212 can shift around a lot in the plane of the motherboard (xy plane. Look at the diameter difference at 3: 30 between the hole and the standoff.
2) The standoffs don't fully tighten to the motherboard. There is a gap when the standoffs are bottomed out.
You can see both of them at 3: 45. Notice how the standoff stays in place as she moves the motherboard around. That is bad, just bad. She says you need to lift it up to tighten it down, but it has already bottomed out.
Thus, the mounting brackets that align the cooler are very loose when it should be tight! Let me repeat. the parts that are designed to align the 212 to the CPU do not function.
Also, I want to point out she did not show using thermal paste between the CPU and the cooler. This is the MOST CRITICAL STEP! The thermal transfer between the two components is very dependent on that thermal paste. You'll have hot CPUs at minimal loads without it and likely damage the CPU at load.
reply
Isaac
I find that the first plate did move too much, the screw on the upper part of the board do not tighten it at all, the screws tighten on themselves leaving a play, about 0. 1 0. 2 mm, so I used small carboard washers (I tune and repair pianos and we use those sort of small thin washers). Now I am not sure it need to be tight, or is the play allowing the surfaces between processor (intel lga 1200) and radiator to fit well together with thermal paste between. Then mostly the thermal paste is locking the radiator, is it correct? (with pressure from the radiator ) I think if the embase is not stable/locked the radiator can move and break the thermal paste joint, in time, is not it? I will check with feeler jauges how much play between both surfaces before installing the paste. Than you for your tips
reply
I find that the first plate did move too much, the screw on the upper part of the board do not tighten it at all, the screws tighten on themselves leaving a play, about 0. 1 0. 2 mm, so I used small carboard washers (I tune and repair pianos and we use those sort of small thin washers). Now I am not sure it need to be tight, or is the play allowing the surfaces between processor (intel lga 1200) and radiator to fit well together with thermal paste between. Then mostly the thermal paste is locking the radiator, is it correct? (with pressure from the radiator ) I think if the embase is not stable/locked the radiator can move and break the thermal paste joint, in time, is not it? I will check with feeler jauges how much play between both surfaces before installing the paste. Than you for your tips
reply
George
Just installed one of these, a couple of things I was looking for:
1) The backplate couldn't get tight to the motherboard initially, there was about 1mm gap. When I screwed the heatsink to it however, it seems to tighten everything up as it pulled the backplate up.
2) The two spring-loaded screws that connect the heatsink to the base don't tighten, but I guess that's the point as they regulate the tension ans prevent overtightening.
Just thought it would be worth mentioning that here.
Assuming I didn't mess anything up, installation was easy and took about 10mins.
By the way, this V2 cooler is very hard to get hold of in the UK, I seemed to have got the last one from Amazon!
reply
Just installed one of these, a couple of things I was looking for:
1) The backplate couldn't get tight to the motherboard initially, there was about 1mm gap. When I screwed the heatsink to it however, it seems to tighten everything up as it pulled the backplate up.
2) The two spring-loaded screws that connect the heatsink to the base don't tighten, but I guess that's the point as they regulate the tension ans prevent overtightening.
Just thought it would be worth mentioning that here.
Assuming I didn't mess anything up, installation was easy and took about 10mins.
By the way, this V2 cooler is very hard to get hold of in the UK, I seemed to have got the last one from Amazon!
reply
Philo
I just replaced my Version 1 with the Version 2, same as in the video. Version 2 was MUCH easier to install, and the RAM clearance is really nice. Whisper quiet too. Don't worry that things seem loose after attaching the rails. When you put the Cooler on with the two screws, things will tighten right up! Make sure you tighten both screws the same amount.
reply
I just replaced my Version 1 with the Version 2, same as in the video. Version 2 was MUCH easier to install, and the RAM clearance is really nice. Whisper quiet too. Don't worry that things seem loose after attaching the rails. When you put the Cooler on with the two screws, things will tighten right up! Make sure you tighten both screws the same amount.
reply
Danial
Nice to see a woman smaNice to see a woman smashing men's world. A question: I installed the brackets but while I tightened all screws and bolts, the bracket is shaking and not fixed. Did I do something wrong? I don't know maybe when I install the tower and screw it up, it might be fixed.
reply
Nice to see a woman smaNice to see a woman smashing men's world. A question: I installed the brackets but while I tightened all screws and bolts, the bracket is shaking and not fixed. Did I do something wrong? I don't know maybe when I install the tower and screw it up, it might be fixed.
reply
Vincent
I bought the v2, the bracket to the motherboard would always rock back and fourth no matter how many times I adjusted it. But once I put the cooler and tighter the screws to the bracket it was a lot more firm. Their was still a bit of play, but nothing major
reply
I bought the v2, the bracket to the motherboard would always rock back and fourth no matter how many times I adjusted it. But once I put the cooler and tighter the screws to the bracket it was a lot more firm. Their was still a bit of play, but nothing major
reply
OMGurtIMshurt
That black bracket was so loose even after putting the stand-off screws on it. Once the metal brackets were on and the heat sink tightened down to them, everything tightened up perfectly. Very nice cooler. Thanks for the video.
reply
That black bracket was so loose even after putting the stand-off screws on it. Once the metal brackets were on and the heat sink tightened down to them, everything tightened up perfectly. Very nice cooler. Thanks for the video.
reply
MDKGunner
I'm literally stuck at the beginning i can't figure out how to put the pegs and clips on the intel configuration on the backplate
Edit i figured it all out i was using the wrong clips etc.
reply
I'm literally stuck at the beginning i can't figure out how to put the pegs and clips on the intel configuration on the backplate
Edit i figured it all out i was using the wrong clips etc.
reply
itech
Do the new fan sf120 from the v2 hyper 212 black works on the v1 hyper 212 evo? They seems more silent. I have seen the original have extra brackets. Is all fan compatible with the cooler?
reply
Do the new fan sf120 from the v2 hyper 212 black works on the v1 hyper 212 evo? They seems more silent. I have seen the original have extra brackets. Is all fan compatible with the cooler?
reply
Plant
I have a 3600x with a stock cooler built in my pc, can I just remove the cooler and replace it without having to put the hyper 212 back plate, basically use the back plate I already have.
reply
I have a 3600x with a stock cooler built in my pc, can I just remove the cooler and replace it without having to put the hyper 212 back plate, basically use the back plate I already have.
reply
Add a review, comment
Other channel videos
 1:8:44