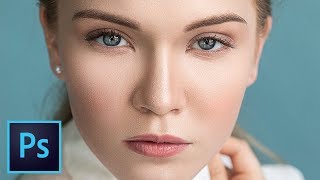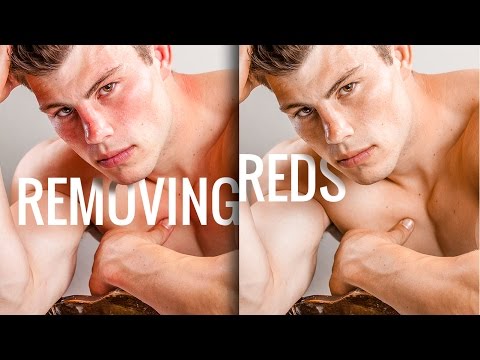
How to Remove Reds from Skin in Photoshop
video description
Date: 2022-07-19
Related videos


Comments and reviews: 20
Shawn
Forgive my ignorance as I was pretty savy in photoshop several years ago, but haven't touched it in several years since. I am needing to remove the red flash sensor marks from a photo. I am not sure if I am describing this correctly to be understood. I rarely have seen this effect in my photos when using a flash. Usually the eyes will have red eye but in my case the red eye sensor/markers on spread out on the facial area and beyond since it is a photo of a young infant. I didn't know how to search for such issue as there may already be a video available
reply
Forgive my ignorance as I was pretty savy in photoshop several years ago, but haven't touched it in several years since. I am needing to remove the red flash sensor marks from a photo. I am not sure if I am describing this correctly to be understood. I rarely have seen this effect in my photos when using a flash. Usually the eyes will have red eye but in my case the red eye sensor/markers on spread out on the facial area and beyond since it is a photo of a young infant. I didn't know how to search for such issue as there may already be a video available
reply
OhWhat
Your tutorials are needlessly overly complicated.
To reduce reds:
- Go to selective colour, with the red colour selected (it should already selected by default) adjust the top slider to the right. The further you move it, the more the reds will be reduced. Play around with the other sliders if the skin is starting to look a bit below or blueish. Adjust 'Black' slider to make the face brighter or darker.
you're welcome.
reply
Your tutorials are needlessly overly complicated.
To reduce reds:
- Go to selective colour, with the red colour selected (it should already selected by default) adjust the top slider to the right. The further you move it, the more the reds will be reduced. Play around with the other sliders if the skin is starting to look a bit below or blueish. Adjust 'Black' slider to make the face brighter or darker.
you're welcome.
reply
Erce
First of all, thank you again for an amazing video. I question I have concerns the part where a layer for the average color is made. After deleting that layer or doing something else in photoshop, the selection of the hue saturation resets (it dissapears, meaning is have to color sample again. I am obviously doing something wrong, but can't figure out what. If someone knows the solution, I'd be glad to hear it!
reply
First of all, thank you again for an amazing video. I question I have concerns the part where a layer for the average color is made. After deleting that layer or doing something else in photoshop, the selection of the hue saturation resets (it dissapears, meaning is have to color sample again. I am obviously doing something wrong, but can't figure out what. If someone knows the solution, I'd be glad to hear it!
reply
privat
I have a question maybe you can help me? How do I get rid of the average blur square that I have in the picture? after I analyzed a certain skin area. The thing is that I did not use a separate layer, so the average blur square color I now have in my picture. I just want to get rid of it.
reply
I have a question maybe you can help me? How do I get rid of the average blur square that I have in the picture? after I analyzed a certain skin area. The thing is that I did not use a separate layer, so the average blur square color I now have in my picture. I just want to get rid of it.
reply
Mario
You just solved a problem with a photo I was repairing from a cellphone shot. I am so grateful you are the best young man. I have gotten incredibly better in providing corrected images for my clients if I happen to make a mistake or they did and had to fix color problems. Thank you.
reply
You just solved a problem with a photo I was repairing from a cellphone shot. I am so grateful you are the best young man. I have gotten incredibly better in providing corrected images for my clients if I happen to make a mistake or they did and had to fix color problems. Thank you.
reply
itech
So helpful! Thank you so much. Just a little problem: you have taught us a way to soften the skin in less than a minute, and I wanted to use it alongside this, but couldn't because upper layer is an adjustment layer (so I can't copy and convert it) what should be done here?
reply
So helpful! Thank you so much. Just a little problem: you have taught us a way to soften the skin in less than a minute, and I wanted to use it alongside this, but couldn't because upper layer is an adjustment layer (so I can't copy and convert it) what should be done here?
reply
Apocalipsis
I just want to say thank you so much i have been obsessively watching all of your videos and that of other people that know photoshop to salvage wedding photos ive mostly have been watching yours but ive learned so much in the past month so thank you!
reply
I just want to say thank you so much i have been obsessively watching all of your videos and that of other people that know photoshop to salvage wedding photos ive mostly have been watching yours but ive learned so much in the past month so thank you!
reply
Juju
I have a question, when I get to the hue/saturation part but there was no color range bar for me to choose the range for the colors? Do you know how to somehow turn it on or is there something different in the settings that I have to go to?
reply
I have a question, when I get to the hue/saturation part but there was no color range bar for me to choose the range for the colors? Do you know how to somehow turn it on or is there something different in the settings that I have to go to?
reply
Lawrence
I have to say, I believe this is one of your best videos. I just used this technique on one of my images today. I could not figure out how to do this and did a search of your videos to learn how to do it.
reply
I have to say, I believe this is one of your best videos. I just used this technique on one of my images today. I could not figure out how to do this and did a search of your videos to learn how to do it.
reply
Denis
You have become my go to source for PS tuts. Im not looking anywhere else! I hope YT and what ever else pays you enough. Adobe should have realized by now you should be paid by them! Keep up the good work.
reply
You have become my go to source for PS tuts. Im not looking anywhere else! I hope YT and what ever else pays you enough. Adobe should have realized by now you should be paid by them! Keep up the good work.
reply
Andre
Ive looked at so many color correction tutorials. The first step in color correction is to convert the image to CMYK for accurate color correction. Never color correct in RGB. That is the most basic rule.
reply
Ive looked at so many color correction tutorials. The first step in color correction is to convert the image to CMYK for accurate color correction. Never color correct in RGB. That is the most basic rule.
reply
doantalentmgmt
control or command. ARGH which is it? It sometimes what youre saying doesnt come thru clearly as well hope you make a revised video of this. In general youre a good teacher! :)
reply
control or command. ARGH which is it? It sometimes what youre saying doesnt come thru clearly as well hope you make a revised video of this. In general youre a good teacher! :)
reply
donna
Thankyou thankyou thankyou. Have been using a similar way of doing this method, but using an average is amazing. Makes a better job. Grateful as always for your videos. Donna
reply
Thankyou thankyou thankyou. Have been using a similar way of doing this method, but using an average is amazing. Makes a better job. Grateful as always for your videos. Donna
reply
ManVir
You are a photoshop genius but you make videos boring by adding unnecessary stuff, please keep it short so that it can be interesting. Its my humble request to you.
reply
You are a photoshop genius but you make videos boring by adding unnecessary stuff, please keep it short so that it can be interesting. Its my humble request to you.
reply
Roz
Thank you for all that you do. your ethics and spirit of sharing are a rare thing in this day and age. Glad to see you are getting the recognition you deserve.
reply
Thank you for all that you do. your ethics and spirit of sharing are a rare thing in this day and age. Glad to see you are getting the recognition you deserve.
reply
anshul
There are two tutorials included in this single tutorial
1. How to remove reds form skin in photoshop
2. How to change yourself into a Smurf easily
reply
There are two tutorials included in this single tutorial
1. How to remove reds form skin in photoshop
2. How to change yourself into a Smurf easily
reply
mildred
this was perfect. Just one problem - I don't have anything to drag in between the top and bottom colour bars - like you do - how do I get this to show?
reply
this was perfect. Just one problem - I don't have anything to drag in between the top and bottom colour bars - like you do - how do I get this to show?
reply
Travel
I know another way: download Capture ONE. In one click, you can create a color mask, refine the mask and erase it in unnecessary places. Do not thank!
reply
I know another way: download Capture ONE. In one click, you can create a color mask, refine the mask and erase it in unnecessary places. Do not thank!
reply
rucy
I have heard a Chinese teacher have a better method to remove redness also using hue saturation adjustment layer, called avatar method.
reply
I have heard a Chinese teacher have a better method to remove redness also using hue saturation adjustment layer, called avatar method.
reply
Willian
you are incredible
I'm learning photography and your tutorials are exactly I need on almost 95 % of my photos.
Thank You
reply
you are incredible
I'm learning photography and your tutorials are exactly I need on almost 95 % of my photos.
Thank You
reply
Add a review, comment
Other channel videos