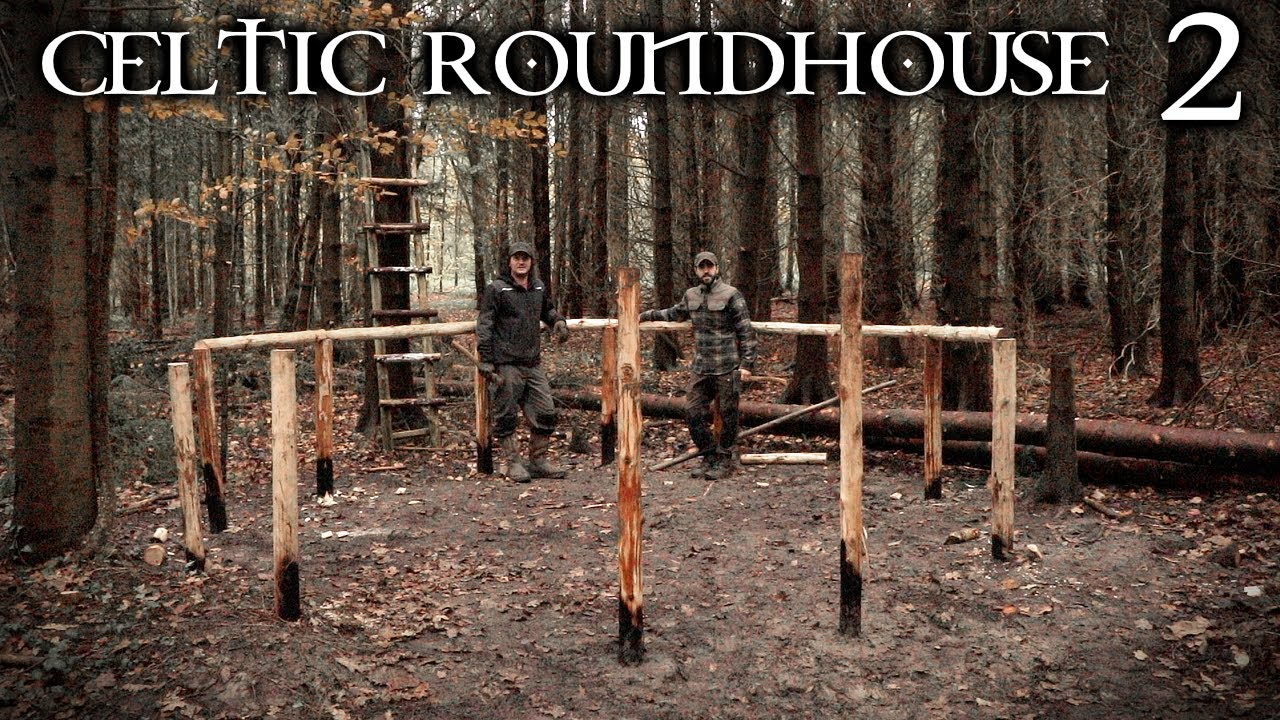
Iron Age Celtic Roundhouse: Building the Timber Frame Foundation Bushcraft Project (PART 2)
video description
Date: 2019-11-27
Related videos





Comments and reviews: 10
Antoinette France
Hiya, just want to say great series, I was on a weeks holiday in Cardiganshire, and on the road between the town of Cardigan and Newport, on the A487 on the right hand side down a small lane there is an Iron Age village called Castell Henllys. It's an actual iron age village and they have rebuilt the round houses where the original ones stood fascinating place, and it has the ability to move a person well it did me. The large round house has a fire pit in the middle and I noticed that the fire is in a square shallow pit, obviously the round house is a lot larger than the one you are building, but I think the fire is in a pit to allow it to be a larger fire. I was lucky as it was November and not very busy and because I'm disabled and use a crutch, one of the staff I think maybe the manager offered to take me up to the village in the sites car what with the village being up on a hill, this very kind lady then walked with me as I walked around and into the 3 roundhouse, which gave me the opportunity to ask questions, one being on how when I was at school (long time ago now) I remembered being taught about the Saxons and round houses, and I remember being told or reading that there would have been a hole left in the roof above the fire to let out the smoke. wrong, the roundhouse's on this site have no such hole, I knew that what I'd been taught was now thought to be wrong but I'd never really asked why, well as this kind lady told me, wish I could remember her name (I'm terrible at remembering names) the reason is had there been a hole above the fire the chances were they would have set the roof on fire, because of the embers being pulled upwards, well who knew, I in my own way had thought it was because as it's a thatched roof there would be possible little bugs and things and that with no opening the smoke passes through the thatch killing any little nasty thing like fleas well it might do that but that wasn't the reason she told me. Now at this point in this comment, or should I say book, it occurred to me I'm probably teaching my nan how to suck eggs, sorry if that's the case, but even if that's not the case I'm sure you will be doing your own research. If you've never been to Castell Henllys I highly recommend it. Well just to add really enjoying the videos, cant wait for the next guys.
reply
Wayne Thompson
Hey MikeIt is coming along quite nicely I can relate to the wet clay issue. I once was trying to shovel out some wet clay and it was like a battle with an underground monster. as I tried to lift my shovel up, my feet would embed even further into the groundYeah, as you made the hole in the post question marks were flying everywhere. If you had been putting the hole to one side of center it might have made sense to me, but only one hole didn't. I thought you might have been intending to have a hole through the cross members and two in each post to match. but then that might actually weaken the post if you had. You cooked Duck and didn't invite me? ;-) You know, Dustin is the Official Master Bushcraft Cook As great as that looked, however, I don't think anything will ever surpass the Propeller Lamb mealKeep plugging away and we look so very much forward to the next episode
reply
Aki Games
I need some help. So I'm building a hut next to a bamboo forest, so the structure is mainly made out of that. The problem is that the roof is to heavy, I made the support beams out of the thickest bamboo I could find, and just where the two sides of the roof connect, there is a beam holding it up and it's connected to 2 trees. The roof is made out of horizontal bamboo, about 20-40 pieces on each side (The roof has two, like this /\ ) and on top of them some grass and stuff to protect against the rain. The top beam and other support beams have cut in 2 under the weight of the roof, causing the walls to shift like this \ /. Any ideas on how to hold up the roof? Also sorry if I made any spelling mistakes, English is not my main language
reply
EGBrandan
Just reading the Living in the Past book today, watching this in the evening, and realized that it's really the same sort of structure as they built a couple of, though theirs were much larger. Unfortunately from what I understand, the actual documentary/ other media associated with the project (apart from used copies of the book) is effectively impossible to find nowadays, or was the last time I looked, especially outside the UK. First learned about it from the interview Lindybeige did back in the day. Anyway cheers, love what you're doing; at the rate you're going though, you may as well start to coppice a few trees to harvest poles for future work instead of using quite so much heavy wood.
reply
Robert Cole
Easy fix, mortise and tenon joints. Mortise on left of every crossbeam and then a tenon on the right. bore through on the mortise, the slightly offset the tenon, then when you drive the peg, the mortise and tenon joints will be nice and tight. :) Just peg the wholes with a square pin so they will be nice and tight. they'll never give and as time goes on, they will only become tighter. Same as the old timers did on cabins and timber frames. Not sure if yellow locust is available there, but they make the best pegs for such an endeavor.
reply
Chris AddottaSmith
Thats almost painful, to watch you ramp all that fabulous raw clay back into the groundMaybe one of these episodes you can make something with it and raku fire it before/after the dinner fire? That would be EPICI always enjoy your videos. I feel like you are a good friend and I am living vicariously through you Its less hard to be house bound (permanent illness, when I get to see the woods and world through folks like you and Joe R. Thanks so much. -Torloc
reply
Marty N
Excellent as usual. In USA, much appreciation. Say, all those woods, dry at times, no water. Can't live without water. How about a vid on digging a well, finding sources of water. if you could have or be allowed to hunt for, find and actually hand dig for water I bet that would get views and help people find water when water maybe in short supply. K. Thanks mate. My best to you and yours.
reply
Johnathan Wilkinson
I noticed that those posts heights were going to be a problem (from the comfort of my armchair. sure I would have made the same mistake in real life, though. I wonder what the ancient people used as a water level in those days? I know they used to use rafts in the moats around castles to get things level, but am not sure about such small buildings as yours.
reply
Edy Vanea
Ah guys: D. you didnt have to redo the beams. all you needed to do was to alternate the notches in the beams so that when they meet, the beams are on the same level (think Tetris. Having them done this way, you could then easily drill all the way through each joint directly into the posts and then peg them in for structural integrity. Anyways, take care guys.
reply
JusBidniss
The original plan could have worked with a half lap joint on each end over the post, one notch up, one notch down, so that the horizontal pieces had no more than one log's thickness over each post, then pin down through each half-lap end into the post top. No need to have the 'wavy' effect, which only happens if your half-lap notches aren't deep enough.
reply
Add a review, comment
Other channel videos