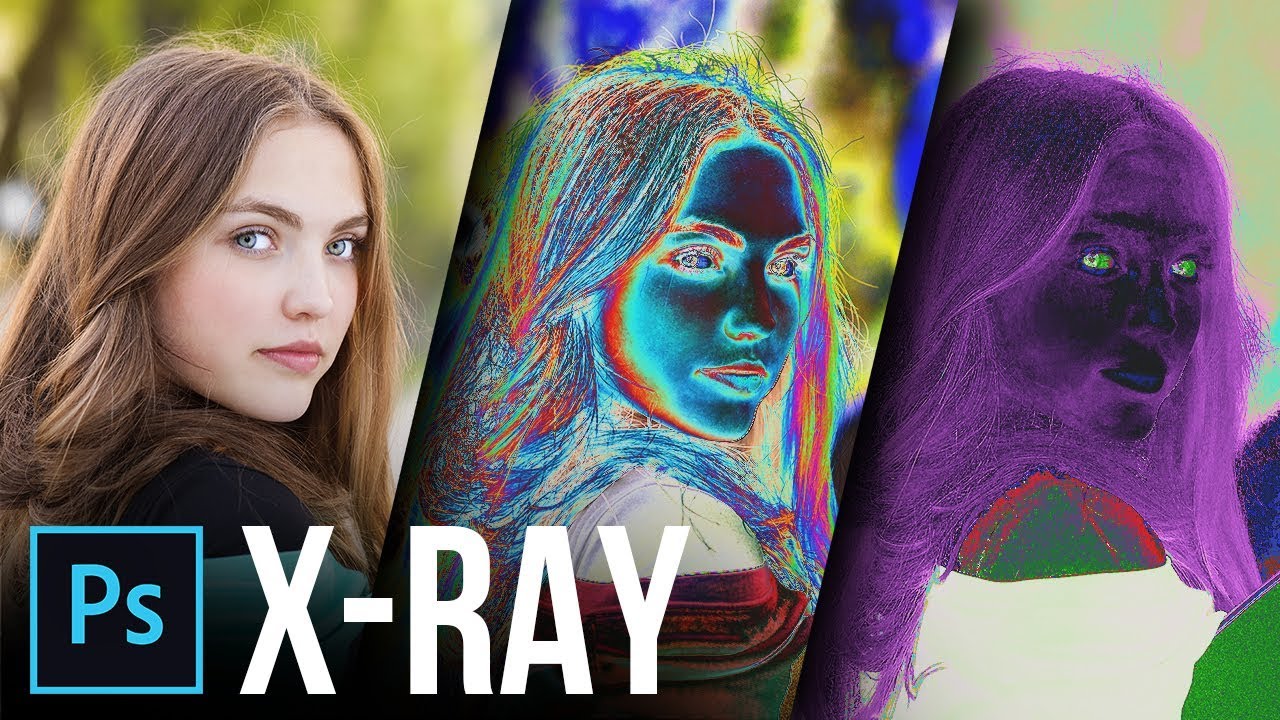
The X-Ray of Retouching: Check Layers in Photoshop
video description
Date: 2022-07-19
Related videos





Comments and reviews: 20
shereef
Luminance, Saturation, and Hue
Luminance is the amount of light
Saturation how much color?
Hue is what color?
1: 20 Start Solar Curve
Usage:
makes every detail visible
Helpful in exaggerating every little detail Details
Recommended:
Use the Spot Healing Brush tool and Healing Brush tool
7: 25 Luminance
Luminance is the amount of light being emitted without color.
Usage:
Dodge and Burn Retouching
Recommended:
use curve Adjustment Layer with a Luminance blending mood with brush flow 2%.
14: 04 Saturation
Saturation is the amount of color
it shows you which areas are very much saturated
which areas are less saturated and which areas have no color
Usage: Matching Color or to be much colorful photo
Recommended:
use Vibrance Adjustment Layer play balance with Saturation & Vibrance up to the maximum that you can go.
Noted:
White is fully saturated
Black is No Saturated.
21: 37 Hue Check Layer
Hue is what color? it is rout color or a pure color
Usage: Color Correction
Recommended:
use Hue & Saturation, Vibrance, and level Adjustment Layer then play with Handel tool.
28: 00 Quick Recap
reply
Luminance, Saturation, and Hue
Luminance is the amount of light
Saturation how much color?
Hue is what color?
1: 20 Start Solar Curve
Usage:
makes every detail visible
Helpful in exaggerating every little detail Details
Recommended:
Use the Spot Healing Brush tool and Healing Brush tool
7: 25 Luminance
Luminance is the amount of light being emitted without color.
Usage:
Dodge and Burn Retouching
Recommended:
use curve Adjustment Layer with a Luminance blending mood with brush flow 2%.
14: 04 Saturation
Saturation is the amount of color
it shows you which areas are very much saturated
which areas are less saturated and which areas have no color
Usage: Matching Color or to be much colorful photo
Recommended:
use Vibrance Adjustment Layer play balance with Saturation & Vibrance up to the maximum that you can go.
Noted:
White is fully saturated
Black is No Saturated.
21: 37 Hue Check Layer
Hue is what color? it is rout color or a pure color
Usage: Color Correction
Recommended:
use Hue & Saturation, Vibrance, and level Adjustment Layer then play with Handel tool.
28: 00 Quick Recap
reply
jeez
2: 20 Solarize Layer, see unwanted spots, removing inconsistencies
10: 10 Luminance Check Layer, reducing the images' brightness values(dodging and burning techniques)
14: 04 Saturation Check Layer Method 1: showing which areas are highly saturated
16: 06 Saturation Check Layer Method 2: Selective Color Adjustment Layer
20: 00 Increase Saturation without losing details
21: 39 Hue Check Layer: True color, shows what color. Removing inconsistencies
reply
2: 20 Solarize Layer, see unwanted spots, removing inconsistencies
10: 10 Luminance Check Layer, reducing the images' brightness values(dodging and burning techniques)
14: 04 Saturation Check Layer Method 1: showing which areas are highly saturated
16: 06 Saturation Check Layer Method 2: Selective Color Adjustment Layer
20: 00 Increase Saturation without losing details
21: 39 Hue Check Layer: True color, shows what color. Removing inconsistencies
reply
Rost
This is awesome! The Solarize and Luminance Checks were awesome. The saturation ones didn't work for me at all. I see the pictures almost fully red, but the color picker tool shows that the colors in those areas are between 10 and 30% of saturation.
reply
This is awesome! The Solarize and Luminance Checks were awesome. The saturation ones didn't work for me at all. I see the pictures almost fully red, but the color picker tool shows that the colors in those areas are between 10 and 30% of saturation.
reply
John
Hi, Unmesh. I am a big fan of your creative and amazing work. Searching on your videos I have not seen any about 'X-ray see-through cloth. Can you make a video on the subject? Though this is a fun way but something different I think. Please.
reply
Hi, Unmesh. I am a big fan of your creative and amazing work. Searching on your videos I have not seen any about 'X-ray see-through cloth. Can you make a video on the subject? Though this is a fun way but something different I think. Please.
reply
Memo
My friend, you are one of the best teacher i've ever seen! How is it possible to be so communitive and not even be present! Amazing skills not only in photoshop!
I deeply thank for all the knowledge and inspiration you share!
reply
My friend, you are one of the best teacher i've ever seen! How is it possible to be so communitive and not even be present! Amazing skills not only in photoshop!
I deeply thank for all the knowledge and inspiration you share!
reply
Caua
Wait a sec, if I create all these layers (15: 10) and the image become totally red, it means that the whole image is with the same saturation value? I'm asking this because I created these layers and it happened to me.
reply
Wait a sec, if I create all these layers (15: 10) and the image become totally red, it means that the whole image is with the same saturation value? I'm asking this because I created these layers and it happened to me.
reply
Kieran
A more faithful Black and White representation for the Luminance Check Layer is using the Black and White effect with the settings:
Red: 27
Yellow: 148
Green: -39
Cyan: 194
Blue: 11
Magenta: 138
reply
A more faithful Black and White representation for the Luminance Check Layer is using the Black and White effect with the settings:
Red: 27
Yellow: 148
Green: -39
Cyan: 194
Blue: 11
Magenta: 138
reply
Matt
These check layers are so great! I love compositing, but being red-green colour blind makes it challenging to match elements up sometimes. This made things so easy with such a brilliant outcome! Thank you Unmesh!
reply
These check layers are so great! I love compositing, but being red-green colour blind makes it challenging to match elements up sometimes. This made things so easy with such a brilliant outcome! Thank you Unmesh!
reply
Chris
This is an excellent way to restore old scanned photos, whether in true color, stained aged sepia, stained aged color, unevenly hand-tinted color, or discovering why a photo just looks inexplicably off to you.
reply
This is an excellent way to restore old scanned photos, whether in true color, stained aged sepia, stained aged color, unevenly hand-tinted color, or discovering why a photo just looks inexplicably off to you.
reply
Ravi
You are so sincere and genuinely interested in explaining things the right way. Very grateful to be learning PS under your kind guidance Umnesh, keep up the good work! thank you: )
reply
You are so sincere and genuinely interested in explaining things the right way. Very grateful to be learning PS under your kind guidance Umnesh, keep up the good work! thank you: )
reply
Cyndi
Thank you for this. I normally use images online but I'm going to print a family photo album. I've already found these techniques save me from errors I couldn't see without them.
reply
Thank you for this. I normally use images online but I'm going to print a family photo album. I've already found these techniques save me from errors I couldn't see without them.
reply
Brian
Is there a difference between using a Black & White layer adjustment layer as opposed to a neutral solid color with a blending mode of color for checking luminosity?
reply
Is there a difference between using a Black & White layer adjustment layer as opposed to a neutral solid color with a blending mode of color for checking luminosity?
reply
Rodrigo
I didn't even finish the video and I have to thank you: GENIUS! Thanks too much! Comparing to the Photographic world you are the Dean Collins of Photoshop!
reply
I didn't even finish the video and I have to thank you: GENIUS! Thanks too much! Comparing to the Photographic world you are the Dean Collins of Photoshop!
reply
bilal
Unmesh you're not just a talented photo editor but an excellent teacher! Love your videos I've really learned a lot from you. With love from Pakistan
reply
Unmesh you're not just a talented photo editor but an excellent teacher! Love your videos I've really learned a lot from you. With love from Pakistan
reply
itech
thank you to explain every thing, and thanks to share them for free, you teach much better than the ones who get money to learn us. thank you man
reply
thank you to explain every thing, and thanks to share them for free, you teach much better than the ones who get money to learn us. thank you man
reply
Joo
Hi Unmesh, thanks for the great (as always) info! I'm creating the action manually but it would be cool if you could share an updated link: -)
reply
Hi Unmesh, thanks for the great (as always) info! I'm creating the action manually but it would be cool if you could share an updated link: -)
reply
Abhilash
I literally sat with a notebook and wrote all the instructions. That's one of the reason I Just Love your Videos. Keep it up BRO!
reply
I literally sat with a notebook and wrote all the instructions. That's one of the reason I Just Love your Videos. Keep it up BRO!
reply
Tyler
Th full red saturation check has a flaw. Adding a Red layer with the 'Color' blend mode will destroy the original saturation values.
reply
Th full red saturation check has a flaw. Adding a Red layer with the 'Color' blend mode will destroy the original saturation values.
reply
Apocalipsis
Couldn't you just do the hue/saturation but set it to color as well? I tried it and it worked the same way am i correct?
reply
Couldn't you just do the hue/saturation but set it to color as well? I tried it and it worked the same way am i correct?
reply
Loucine
I can't believe your content is free! this is such great help for beginner editors. Man, you are a gift from the heavens!
reply
I can't believe your content is free! this is such great help for beginner editors. Man, you are a gift from the heavens!
reply
Add a review, comment
Other channel videos